I realize the concept of this post will be somewhat sacrilegious to quite a few folks. Smoked brisket (especially in Texas) is a time honored tradition — one best honored by spending a heck of a lot of time tending the firebox on your smoker. To a good many aficionados, if you don’t end up smelling like post oak smoke for the next week, you didn’t really make barbecue.
On the other end of the spectrum, from a sous vide standpoint, many seem to be obsessed with cooking their meat to be as rare as possible to maintain certain flavors and textures. It’s an interesting culinary challenge, and it’s definitely a technique worth mastering for those who are accustomed to traditional cooking tools and techniques.
Let’s be clear — that’s not at all what we’re going to do here.
(Pit masters, you can let out a big, smoky sigh of relief.)
We’re going to do what we can to meld these two seemingly disparate techniques together to gain the advantages of both and make one incredibly delicious slab of meat.
There’s a method to the madness in this process, and it’s all about control.
Smoked brisket is the ultimate “low and slow” meat, but in this case, medium rare is just too “low” for this sort of application. A lot of the magic that happens in that smoke box happens when the meat is a good 30-60º F (17-34ºC) above the temperature of a warm, red center. And let’s face it, we’re not cooking a nicely marbled steak from the soft, squishy loins of the cow. We’re cooking a big chunk of well-worked pectoral muscle with a lot of connective tissue running through it. The collagens in that brisket are going to denature into gelatin at temperatures above 160ºF / 71ºC. You absolutely want that to happen.
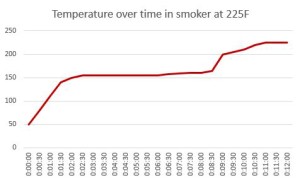 The Stall
When smoking a brisket using the traditional method, there’s a point during the smoking process where the core temperature of the meat stops rising, sometimes for a very long time. People call this “the stall.” What’s happening is that moisture in the brisket is evaporating, and that evaporative cooling process keeps the meat at a fairly steady temperature (it may even decline a bit) until the meat starts to dry out. How you feel about the stall and what you do about it depends on how you like your brisket, how much you stick to certain “traditions,” and how much time you have. There’s a whole boatload of factors that affect this phenomenon, including (but not limited to) the fat and moisture content of the meat you’re smoking, the wood you’re using, the humidity, the temperature at which you’re smoking, and the flow rate of the air through the smoke chamber.
The Texas Crutch
That’s a big reason some people wrap their briskets in foil when they get to this stage, a technique often called “The Texas Crutch.” Most who do this splash a little broth, apple juice, or beer in the foil. (For many it’s just an excuse to open another beer.) What you’re doing with The Crutch is basically braising the meat. Some call it cheating. Some prefer it. If you like “crusty” edges, you probably don’t crutch. If you like juicier meat, you probably do. Despite the connotations that could come along with the name, let’s not consider “Crutch” to be a pejorative term for the purposes of this exercise. Let’s understand its purpose, its advantages, and its trade-offs. (Spoiler alert: What we’re going to do is basically take The Crutch and crank it up to eleven.) What you’re doing with The Crutch is giving yourself more control over the temperature and speeding up the transfer of heat into the meat. You’re raising the humidity in the cooking area (by confining it to the area inside the foil) and cooking with more conduction and less convection. You’re not allowing the “sweat” to evaporate off. It’s like making a cozy little meat sauna.
There are three main reasons people crutch:
- The Crutch allows you to speed right through the stall and cook your brisket faster.
- The Crutch gives you more precise control of the cook temperature. Though it raises the internal temperature faster, it also gives you a little flexibility on the upper end because the liquid keeps you from overcooking the meat so quickly when it gets closer to 200ºF / 90ºC.
- The Crutch prevents you from putting too much smoke flavor into your brisket. Once you get the level of smoke you want, wrapping it prevents you from ending up with a brisket that tastes like an ashtray. (Though not technically “crutching,” I’ve heard this is the main reason Aaron Franklin wraps his briskets in butcher paper. This clip seems to confirm that.)
So about the sous vide…
With the crutch in mind, let’s talk about what is essentially the biggest freaking point of the immersion circulator: precise temperature control.
Even the most dedicated pit master can’t control everything about the environment in their smoker to the same degree that even your cheapest circulator can control the water bath. Keeping your smoke box within a 5-10ºF window is an admirable skill. The pit master has to work the balance between time and temperature and pull the meat off the heat at the point where as much of the collagen has “gelatinized” as possible, but before things start to dry out or get tough. If you take it off too early, you don’t get that delicious rendered fat and collagen denatured into wibbly-wobbly gelatin. If you leave a brisket sitting at 225-250ºF long enough, it will eventually be 225ºF, and that’s simply overdone.
Keeping a circulator within one tenth of a degree is so easy you can do it in your sleep. Let’s use that to our advantage, shall we?
Speaking of sleep, that’s another advantage of the process below. It allows you to have substantially more beauty rest. Because the circulator makes it so easy to maintain temperature, you’ve got a much wider window of opportunity to work with, and you can adjust your cooking schedule to allow you get a full night’s sleep in while the circulator does its thing.
Process Overview
Here’s the Cliff’s Notes version of what we’re going to do:
- Smoke the meat the “old fashioned way” for a few hours to get your smoke flavor and a nice, red smoke ring.
- At the point you’d wrap or crutch your brisket, pull it off the smoker, seal it in a vacuum bag, and introduce it to the water bath.
- “Turbo Crutch” the brisket in the water bath overnight.
- Bring the temperature of the bath up a bit.
- Remove from the bath and get some of that bark back.
- Make some sauce for folks who want it.
- Rest and serve
The Kit
- Smoker (I used an offset smoker similar to this one.)
- Immersion circulator (I’ve got an Anova.)
- Vacuum sealer (This’ll do.)
- Vacuum bags (With big pieces like brisket, rolls are easier than pre-cut bags.)
- Container for the water bath (I used a 12-quart Cambro and a lid with the corner notched out for the circulator to stick through.)
The Ingredients
The Brisket
- One brisket
- Your rub
- Absolutely necessary:
- Kosher salt
- Black pepper
- Optional:
- Cayenne pepper
- Chili powder
- Absolutely necessary:
The Sauce
- Save the brisket cooking juices from the sous vide
- A splash of Worcestershire Sauce
- A generous squirt of tomato paste. (I used this one.)
Here we go!
1. Cut, trim, and rub the brisket
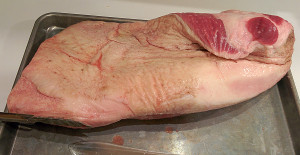
The whole packer, directly from the cryovac bag.
Separate the “point” from the “flat” of the brisket. (Here’s a good illustration. My cut wasn’t as precise as this, but it still worked well.) For the purposes of this demonstration we’re going to do just the flat.
Why? A couple of reasons:
- You’ll need big bags and a big bath to throw the whole brisket in the sous vide at once.
- In a very real sense, these are two different pieces of meat. Each will cook differently. I chose to do the flat, because that’s the part that’s usually tougher since it’s leaner. Since we’re going to make it super tender thanks to the long immersion bath, this piece will benefit from the technique more than the point.
- I didn’t have as many people to feed. I separated the two so I can cook the point separately at another time. Also, I think I’m going to go ahead and smoke it the “old fashioned way” because I love burnt ends, and that’s the best part about smoking the point. (In my opinion.)
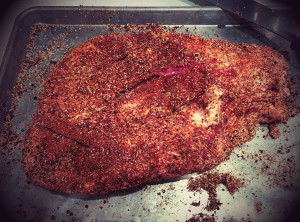
Here’s the flat after the rub was applied. This is the “under” side, which has a lot less fat so it looks very red. The rub didn’t have THAT much chili powder in it.
For standard smoking techniques, people vary in their opinions of how much fat to trim. For the sous vide brisket, go head and trim the brisket a little leaner than you normally would since the fat that renders after it’s put in the bag will stay right up against the meat and you’re not losing it to drippings into the smoker.
Give it a good rub. Salt and pepper are the important parts, of course. This time I threw some chili powder and a bit of cayenne in the mix. I wanted to see if the sous vide process would bring out those flavors. I wouldn’t say that it did. If anything, the long sous vide brought out the flavors in the meat and made the rub less of an issue.
Go start your fire now.
2. Smoke
I smoked the brisket over a mix of hickory and mesquite. I didn’t choose that for any specific reason. It’s just what I had in my wood pile. Normally for brisket I’m partial to oak or pecan. Anyway, that’s not all that important for this discussion. Use what you like.
I smoked the brisket for about four hours, from 8pm to midnight on a Saturday. It was nice not having to wake up before dawn to start the fire. I’m not a morning person. When I was done with the smoker for the night I put the fire out and went to bed without giving it another thought. That felt great.
3. Bag it and seal it
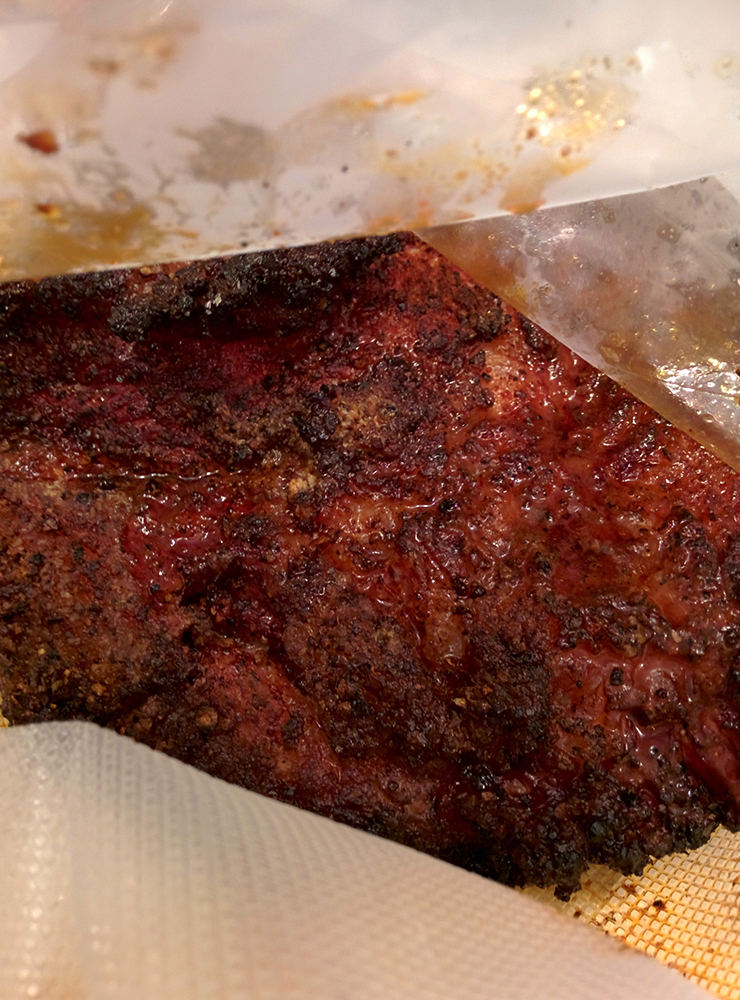
Here’s the brisket out of the smoker and in the bag just before sealing.
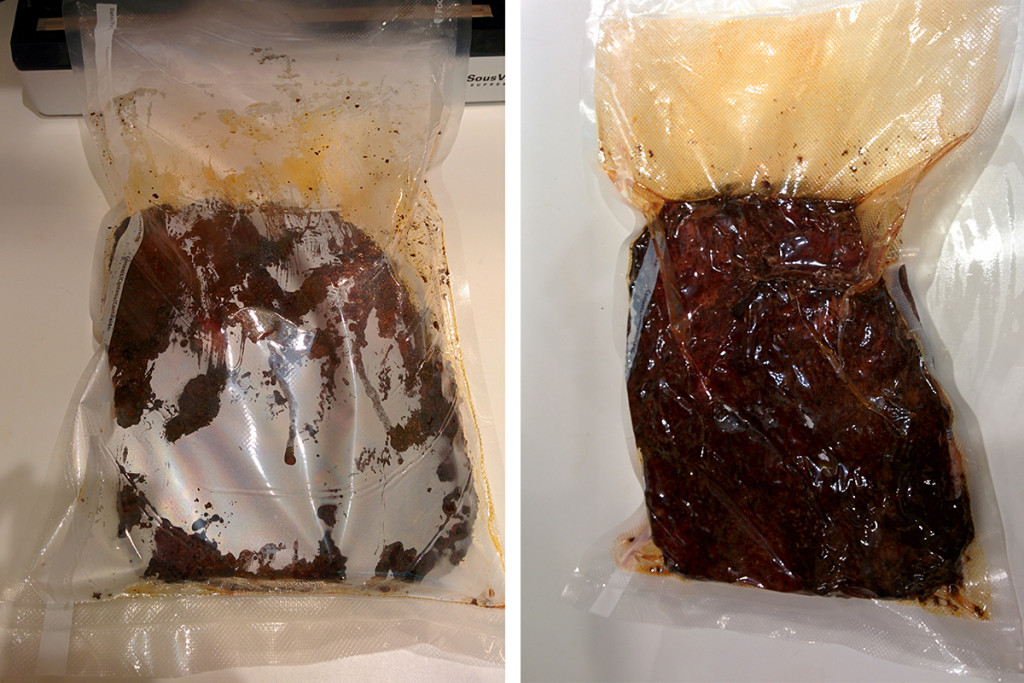
And here we go with the sealer.
I did a double seal on each end of the bag. Just in case. That seems to work better with my sealer.
4. Put the brisket into the bath
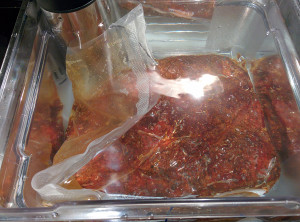
The brisket in the water bath. I probably could have benefited from a slightly larger container, but this still worked great. (Had my brisket been any larger, I’d have been in trouble though!)
Just after midnight, my brisket went into the water bath.
Set for 185ºF / 85ºC, throw a lid on your container, and get some well-deserved sleep.
Here’s where the magic happens. At this temperature we’re above the stall, but well below being overdone. Over the next several hours fat will render, connective tissue will break down, and all that collagen will turn into succulently squishy gelatin.
When you wake up, top off the water if you’ve lost a significant amount to evaporation, and let the bath continue.
My total immersion time at this temperature was 14 hours. I think anytime after about 10 hours you’re going to get about the same result.
Two and a half hours prior to serving, bump up the temperature to 203ºF / 95ºC. That’s the temperature a lot of competition pit masters aim to pull their briskets off the smoker. (I learned that here. Based on my own anecdotal experience, I’m inclined to agree.) Let the bath sit at 203ºF / 95ºC for an hour and a half to two hours.
5. Drain the cooking liquid
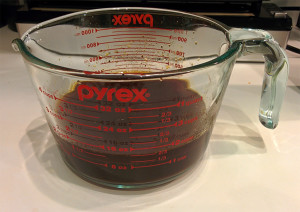
This “au jus” is super rich. We’ll use it later to make some sauce.
Over the course of that long immersion quite a lot of liquid will cook out of the brisket. Quite a lot will stay inside the brisket. This will be one seriously juicy hunk of meat.
Cut a slice in the corner of your bag and drain that juice into a non-reactive container. (I used a one quart Pyrex measuring cup.)
Set this aside.
6. Bring some crust back
Here’s what the brisket looked like when the immersion bath was complete and the liquid was drained:
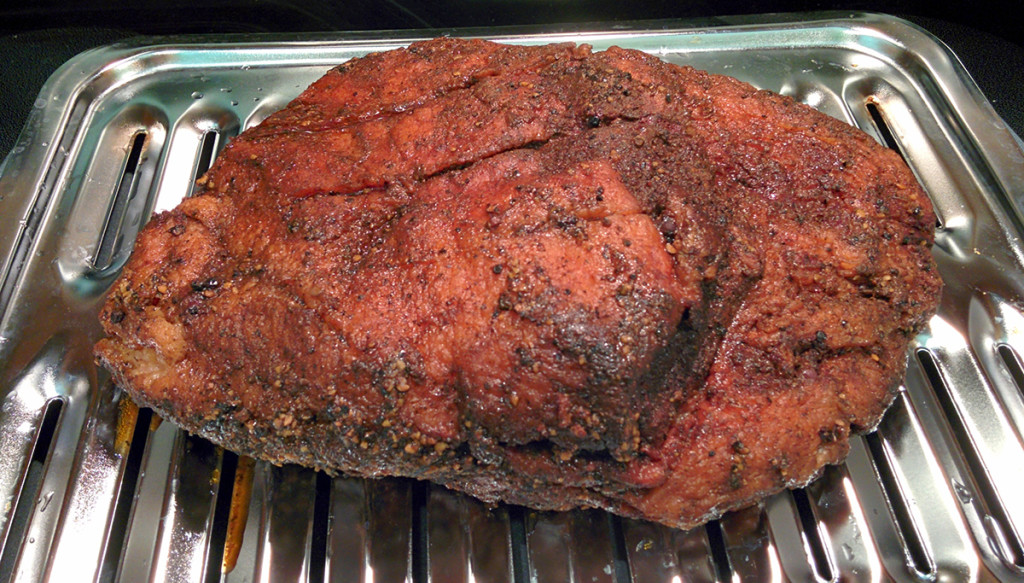
It doesn’t look all that different from when it went into the bag. It shrank a bit and it jiggles like Santa Claus now, but otherwise it looks pretty similar.
(You can definitely see where my sloppy trimming left a big chunk of point intact on the flat.)
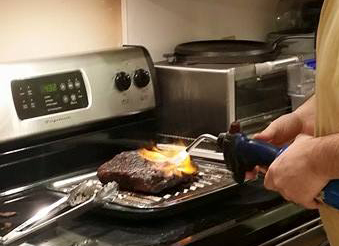
Torching the brisket
One of the drawbacks of the Texas Crutch is that it softens up any bark you created during the smoking process. That’s even more true of our “Turbo Crutch,” as well. That’s part of the reason I said I reserved the point to smoke in the traditional fashion. Burnt ends are not going to be a big draw on this brisket.
We can put some of that crustiness back, of course. I considered throwing the brisket under the broiler, but opted for a slightly more violent approach. (The wife gets excited when I break out the torch.)
You’ve still got a good sized coating of rendered fats and a chunk of fat/gelatin on the top of the meat. When you hit it with high heat, it sizzles in an extremely satisfying way.
In retrospect, I could have torched this brisket a bit more. It’s certainly not the thick, black bark you’d find after 12 hours of direct smoke, but we definitely crisped up the exterior.
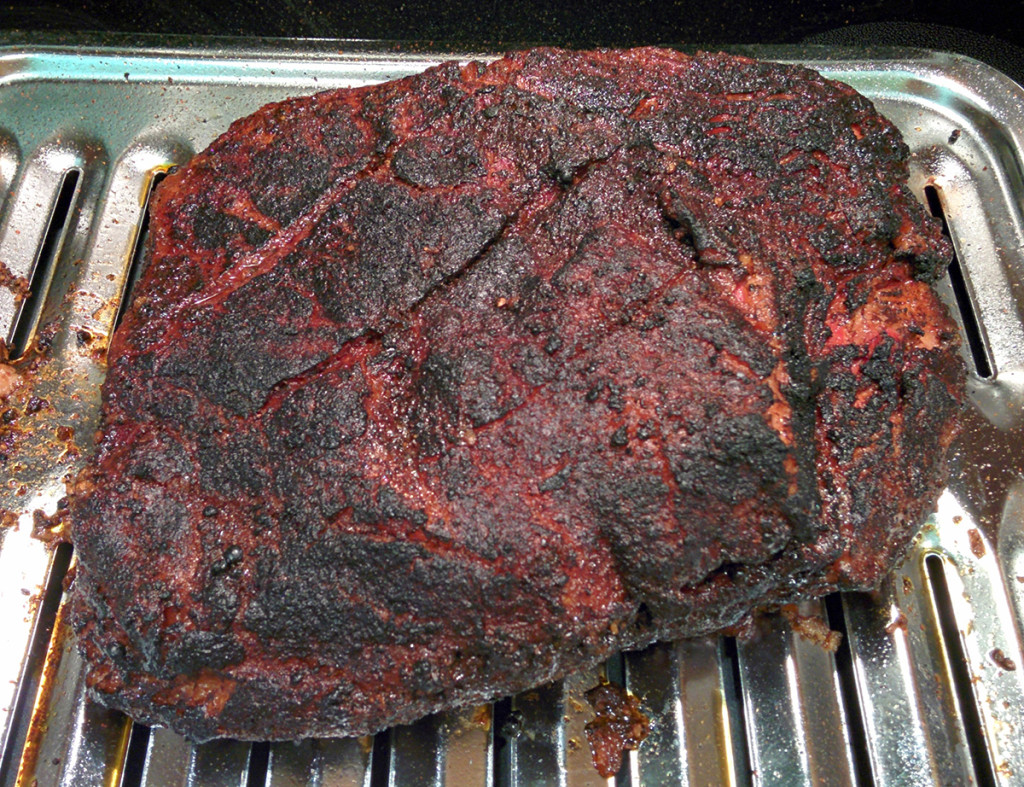
At this point, I wrapped the brisket in foil and placed it in an insulated cooler for transportation to the mother-in-law’s house for dinner.
7. Sauce
You don’t really need it, but you’ve created one heck of a base for a sauce, so you might as well use it. (Even if you don’t put it on the meat, dip a little bread in it on the side. That’s pretty tasty, too.)
My brisket gave me just under two cups of liquid that cooked off. I put a splash of Worcestershire sauce in to taste, and then added enough tomato paste to thicken it up. How much of each you use will depend on how much “au jus” cooks out of your hunk of meat.
8. Let’s cut
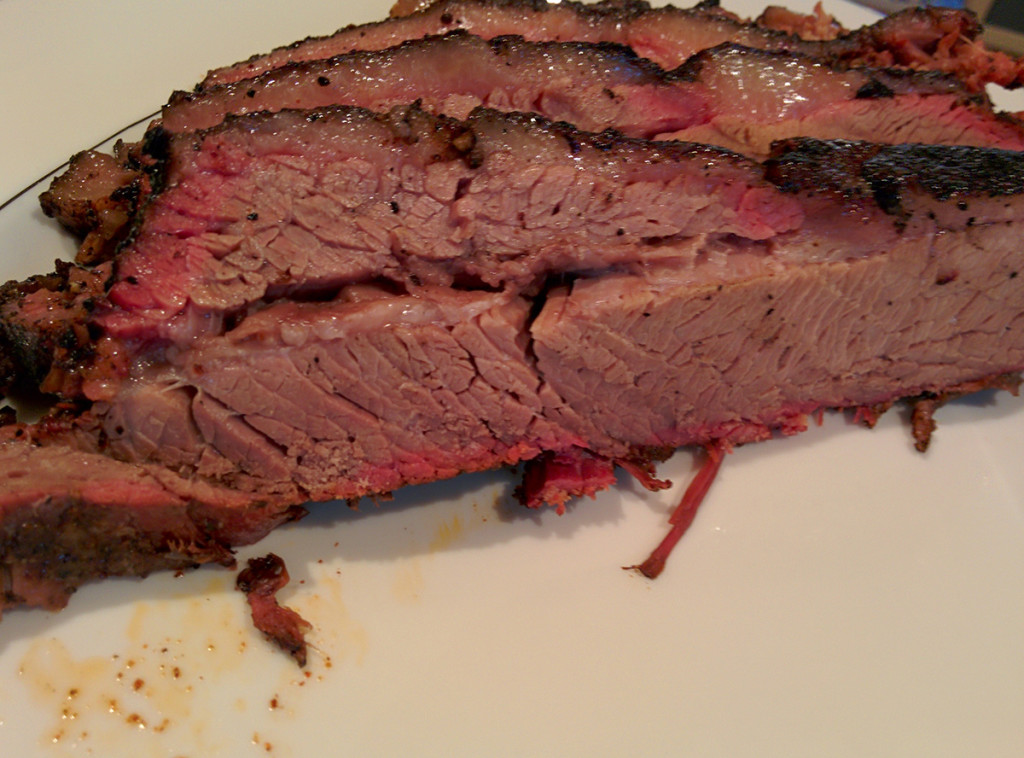
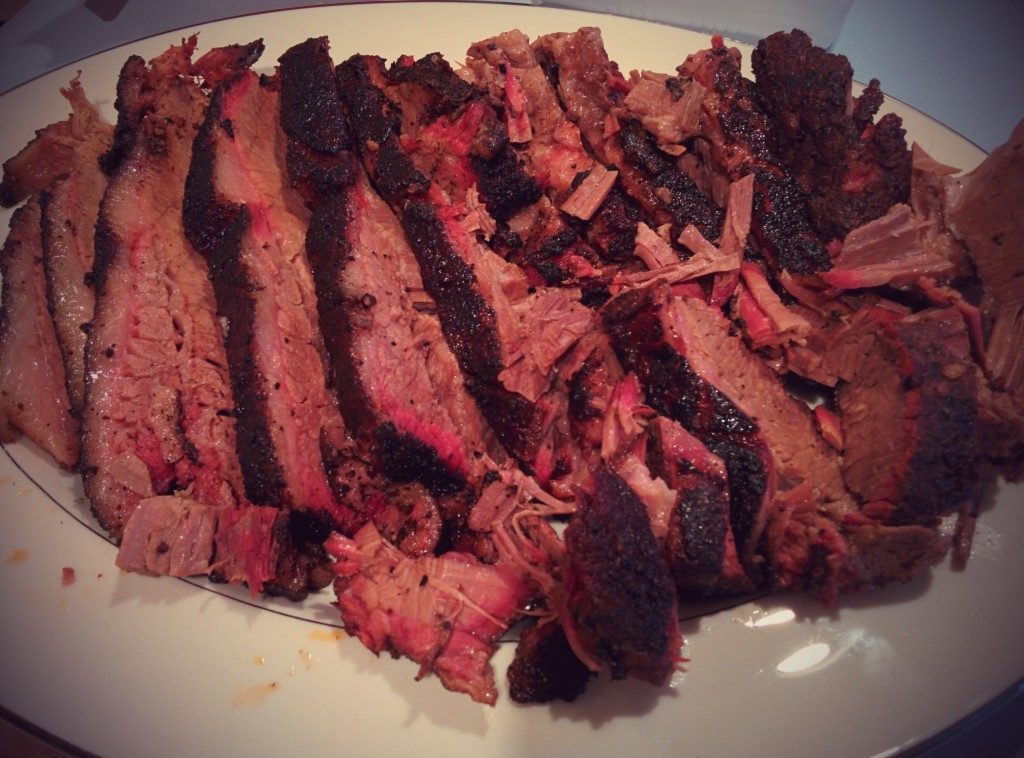
After about 30-45 minutes rest we sliced it up. I sliced most of it about pencil-thick. I should have given the knife a quick honing before cutting, and possibly cut a tad thicker, but it still came out great.
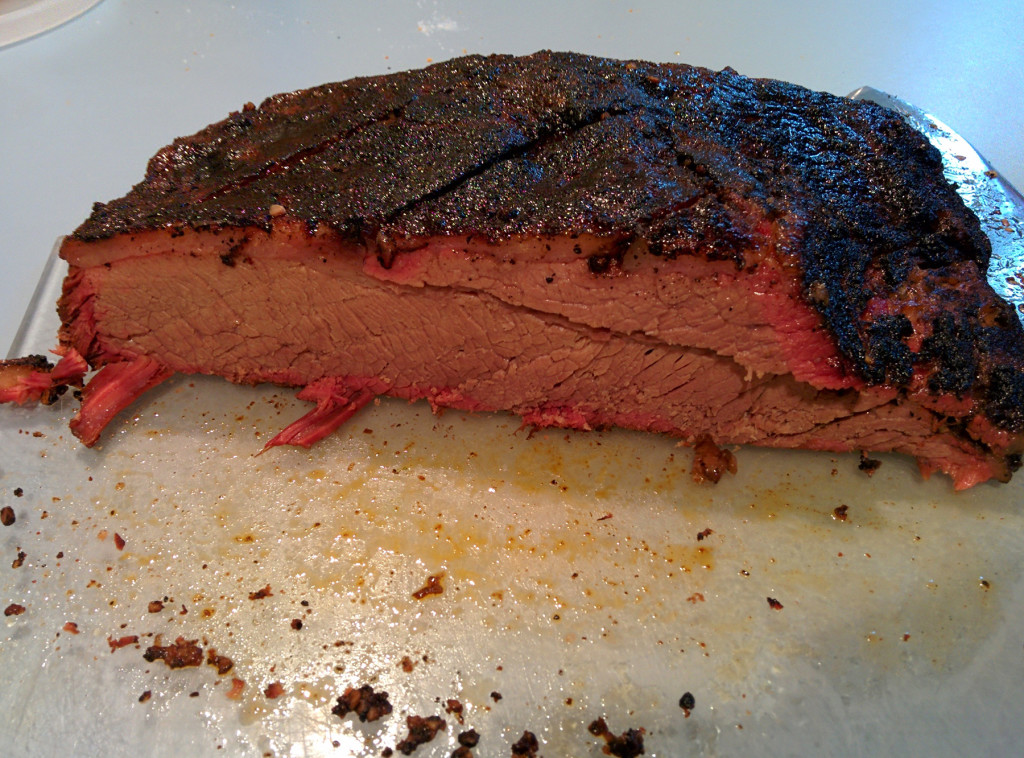
You can see, this is from the end with the sliver of point overlapping the flat. The smoke ring turned out beautiful.
Conclusion
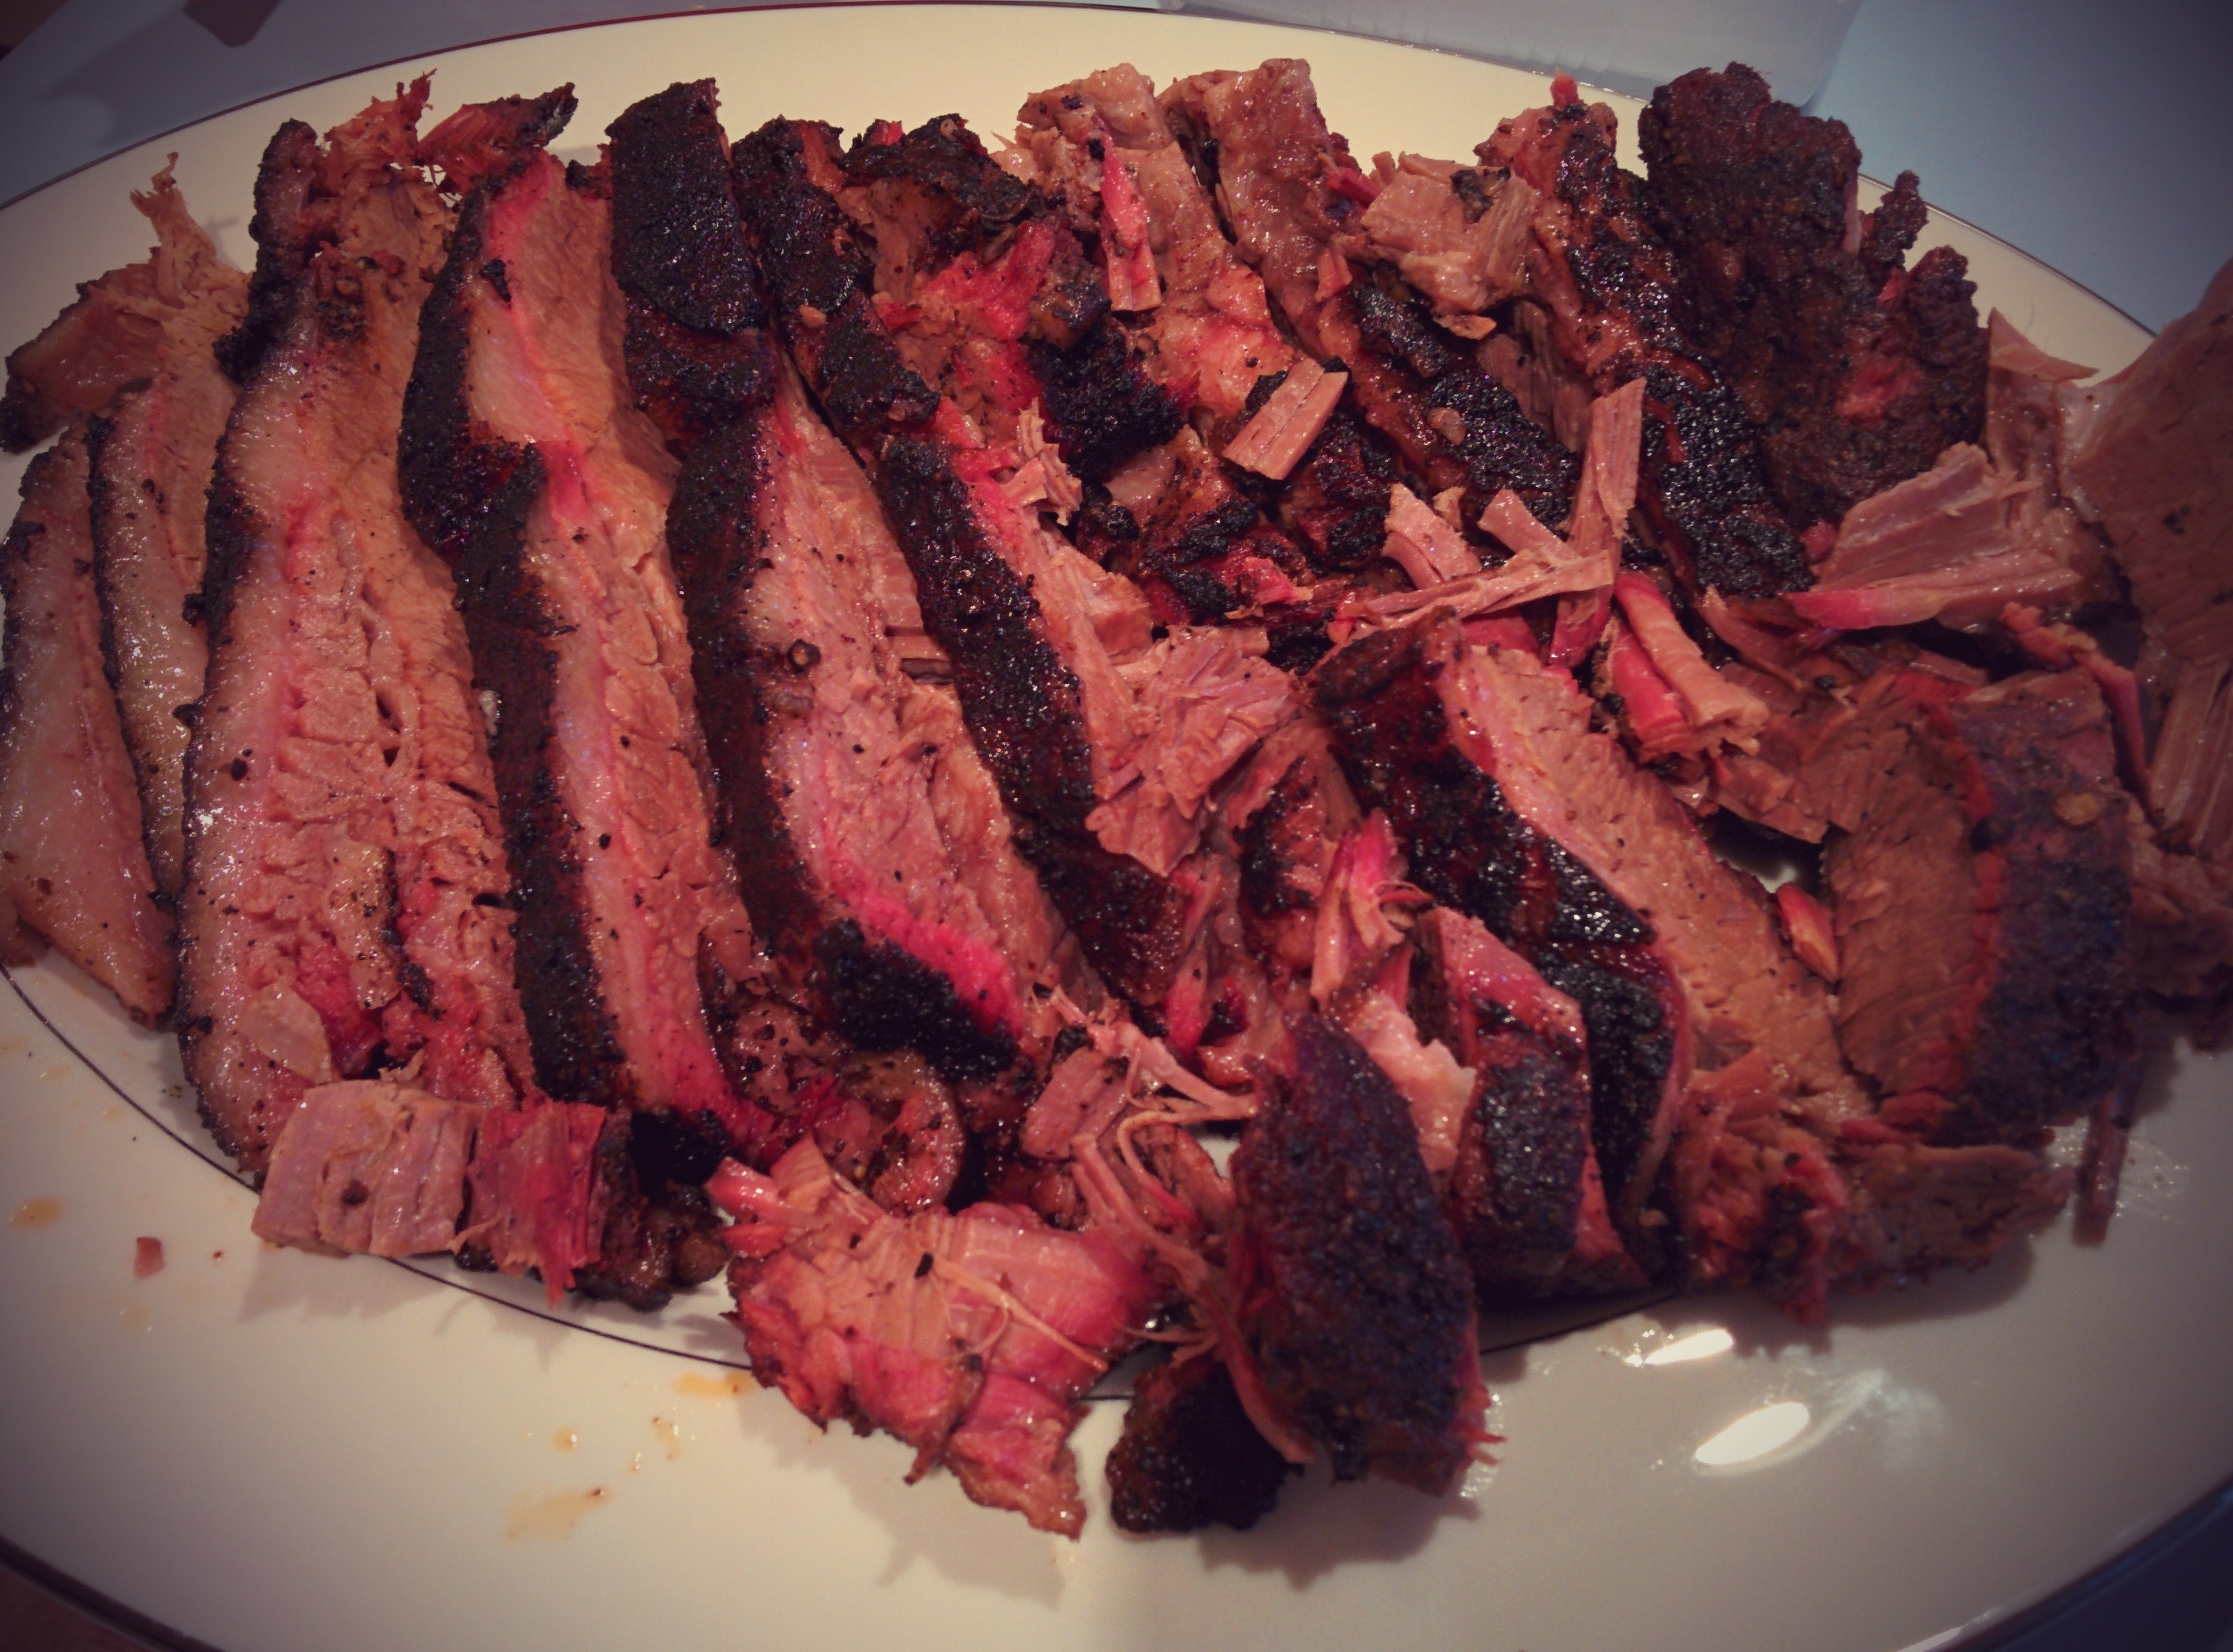
In the end, I was extremely pleased with the result. So was the rest of the family. The texture of this brisket was incredible. The muscle fibers felt silky, buttery, soft.
Did we make a traditional Texas brisket? No.
We made something different — something we’ll definitely make again and again. Not only is it much easier to prepare to schedule, it’s delightfully richer — almost creamy — and a surprising twist to folks who almost certainly haven’t had anything prepared like it before.
Sah,
Have you no decency? Cooking a national treasure like Texas Brisket in a bath – the same way my sweet Tellulah Belle prepares each Saturday evening to meet our Lord and Savior at church the next morning? You’ve given me the vapors. I’m only surprised that you didn’t present the final meat travesty with a fresh plucked bouquet of Texas Bluebonnets to complete your treason.
Does your villainy know no bounds? I heartily anticipate your next posting of your recipe for bathed Texas Chili (with beans, no doubt) or some sort of boiled Country Fried Steak with brown gravy instead of cream.
Yours,
Buford T. Hogwaller
General,
I’ll admit, my approach borders on pure and simple culinary communism.
But after I finish this Diablo Sammich and a nice, cold Dr. Pepper I’m going to head back to the kitchen. You’ve actually given me an idea I think I can run with.
If I burn my house down, it’s going to be all your fault.
Thank you kindly,
Bo
Great post! I’m actually in the middle of cooking this exact same thing and I googled to find out what temp I should set my sous vide cooker when I found it. Thanks for sharing, you helped me take out the guesswork, I hope this turns out good. Looking forward to more posts!
I have a piece of prime brisket flat just over 2 pounds. I don’t have access to a smoker, so I’m going to have to use liquid smoke and smoked spices in the rub to try to replicate the smoke flavor. Given the size of the flat I have and the fact that I won’t be smoking the meat to begin with, would you adjust the cooking time in the water bath for your method at all? I’m also planning on brining the flat for a few days before cooking. Would that impact the process at all?
Thanks!
Great questions, Craig!
Regarding cook time:
At two pounds, your flat was probably about half the size of the one I did for this example. Though I did 14 hours (12 hours at 85C and 2 hours at 95C) I don’t think I’d cut down the time very much more than to the 10 hour point. You could certainly “get away with it” since you’ll have it at a safe core temperature in a much shorter time that that, but I’d probably still do at least 10 hours combined time at the two stages, especially since you’ll be coming from a colder temperature instead of off the smoker. Brisket is tough, and unless you’re taking it over these temperatures (like in a smoker or oven) it’s going to take a very long time to overcook it, and since you’ve both brined it AND you’ve cooked it sealed with its own juices, it’s definitely not going to dry out.
As for the brining affecting the process:
The three main purposes of brining when cooking a brisket traditionally are to add flavor, to preserve moisture, and to tenderize.
– Flavor: Perhaps knock down the salt in the rub just a touch? But maybe not. Just depends what you’re going for.
– Moisture: Won’t be a problem with this brisket whether you brine or not.
– Tenderness: I’m curious to hear how yours turns out. You might need to slice a little thicker if it turns out more tender, but I suspect that the final result will be fairly similar.
Since you’re doing this without smoking first, you might consider doing the rub after the bath instead of before, and then finishing in the oven. Perhaps something like this process from Chef Steps will help you hit what you’re looking for with the smokerless preparation. I still like the temps and two stage bath from my process, but I suspect both ways are great.
Good luck!
Hello! I am planning to test out this recipe for playoff football in sunday. I have read quite a bit about doing a sous vide brisket and this is the only place I have seen use an 185 sous vide temp. Looks like most people use 140-165F. I definitely want as close as I can get to a traditional bbq smoked brisket so im definitely going to give 185F a shot, im just afraid its going to dry out! did your really come out as moist and juicy as it looks?
also, do you think going longer than 14 hours would be detrimental? I may end up closer to 18. Just curious.
thank you!!
Sealed in the vacuum bag I can tell you the brisket absolutely will not dry out. It will release a good bit of liquid, but that’s liquid that would have evaporated during a traditional long-smoke. With this method it stays right up around the meat the whole time and has nowhere to go and evaporate. As you cut, you’ll have juices flowing all over the place. THAT I can guarantee.
How it turns out if you go that long with the cook, I’m less certain of. I suspect it will end up super soft. Probably too soft. It’s pretty delicate to cut as prepared above. The longer you let it go in the sous vide, the more collagen will denature into gelatin, and as the name suggests, the texture will get more and more jello-like. For the most part, this process takes place above 160F, so if you really want to cook it longer, but don’t want to change the texture too much, I’d consider backing the temperature down to 150ish for the final 5 hours to slow that down.
Just tried this for the first time with a smallish brisket from Costco. Made my own rub (lots of brown sugar with various spices), 4 hours on the BGE at 165, refrigerated till this morning, 10 hours in sous vide bath as outlined here, then a good sear on hot gas grill. Perfection! Thanks for sharing your recipe in such detail. Definitely a keeper.
Glad you liked it!
I especially like your refrigeration step. Good idea. I bet that made it easier to prep for the bath, too!
Refrigeration was needed due to time constraints, but haven’t we all found that certain recipes seem to taste better the next day? In this case, smoke (mesquite and Jack Daniels whiskey barrel oak chips) and rub had a chance to meld and mellow before the sous vide step, and the flavor was superb. Preferred it without the sauce I’d made from drippings, though the latter was good, too. Thanks again!
I have thought about doing this method, but brisket is not like steaks or chicken. To achieve the perfect done-ness is a factor of time + heat. You need to hold it above 160 long enough for the collagen to break down, but if you leave it there too long it will turn to mush. In other words, you need most of the collagen to break down, but not ALL of it to break down. On a smoker, I can feel when the brisket is done, not so in a vacuum bag.
The meat above looks delicious, but is clearly overcooked. A prefect slice of brisket can be sliced pencil thick and draped over your finger without falling apart. A slight tug on the edges and it snaps in two. This is the supreme challenge of brisket because the time/temp required to achieve that vary with each cut of beef, the weather, and probably many other factors I’ve never even considered.
I think using sous-vide could eliminate some of these variables, but the particular cut of beef will always be a problem. And there will be no way to check it while it is vacuum sealed.
Correct. If what you’re looking for is the perfect example of traditional smoked brisket, this method is likely not for you. You’re probably not going to be satisfied with any result that doesn’t come from tending to a fire for a long period of time.
With practice I think you probably COULD feel more in a vacuum bag than you’re giving yourself credit for, but it will feel DIFFERENT than bare meat on a smoker would so it will take plenty of practice to get there. I can understand why someone wouldn’t want to do that if it’s not what they’re after in the first place.
Comments are closed.